Reinstall Firmware
You can restore the EZCast Pro Dongle II by reinstalling the firmware. There are several reasons for doing this:
-
The EZCast Pro Dongle II won't power on (after verifying power supply). This may indicate an interrupted update process.
-
The EZCast Pro Dongle II is unstable and a reset didn't help.
You have two options: Install either the latest firmware or a different firmware version.
Install Firmware via USB Cable
Warning
Reinstalling firmware will reset all settings to factory defaults.
Requirements
-
You need a Windows PC to install the firmware software on the EZCast Pro Dongle II.
-
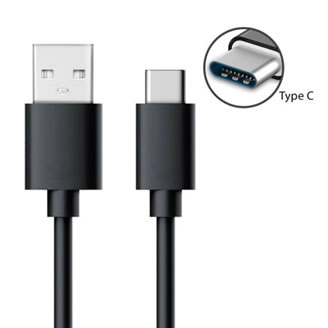
The firmware update must be performed using the included USB Type C cable on Microsoft Windows.
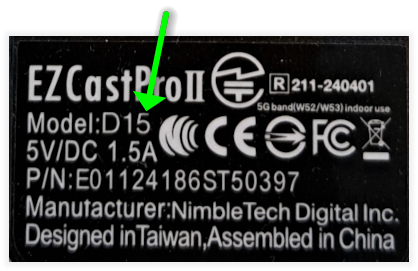
Identify D10/D15 Model
First check the device model number on the back - either D10 or D15.
Install D10 Repair Tool
Install EZCast Pro Repair Tool
-
Download the EZCast Pro Dongle II (D10) Repair Tool.
-
Extract the EZCastPro.D10.Repair.Tool.zip file.

- Install drivers by running the batch file
EZCastPro.D10.Repair.Tool\usb_driver\install.batas Administrator.
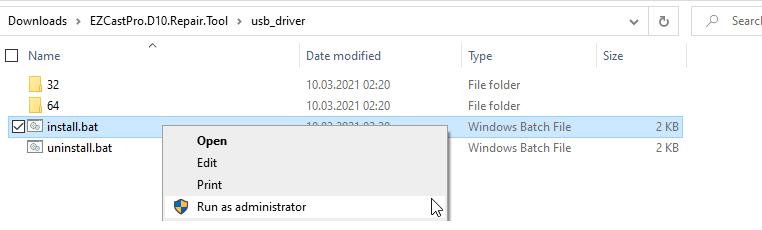
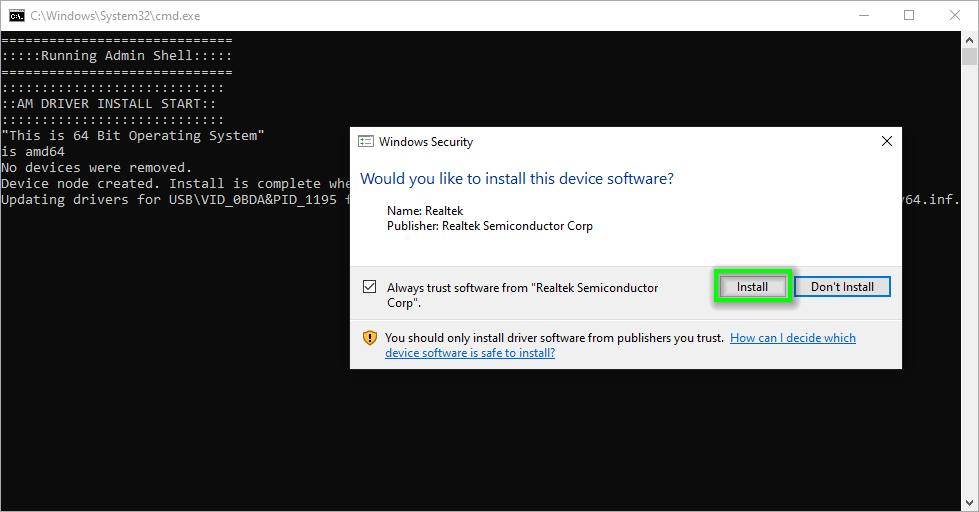
- If this security prompt appears, select "Install":
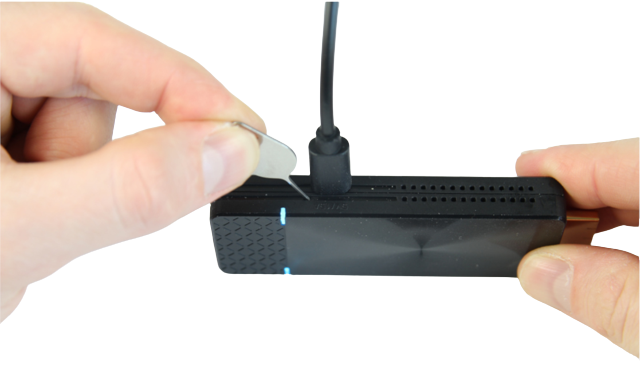
Connect USB Type C Cable
Note
Initially connect the USB Type C cable only to the dongle's USB port (device powered off). Connect the other end to your PC afterward.
-
Connect the included USB Type C cable to the dongle's USB port (device remains off).
-
To enter update mode: Press and hold the reset button, then connect the USB cable to your Windows PC. Release the reset button after 5 seconds.
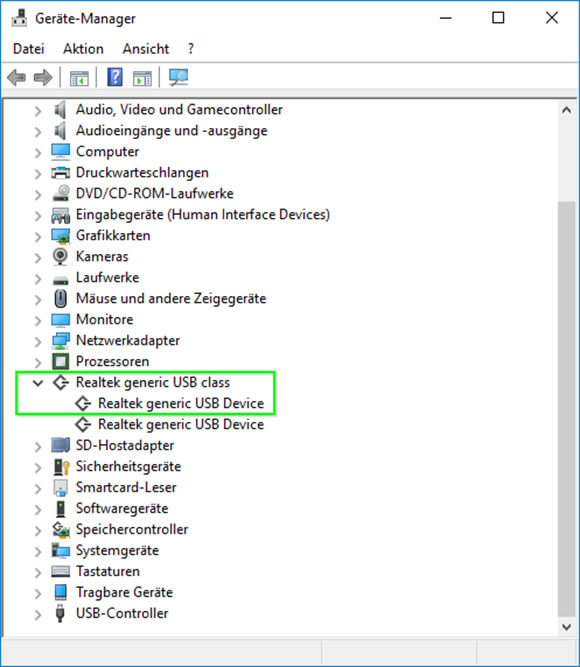
If drivers are correctly installed and the dongle is connected, you should see "Realtek generic USB Device" in Device Manager. Otherwise, recheck driver installation, cable connection, and update mode as described above.
Install Latest Firmware
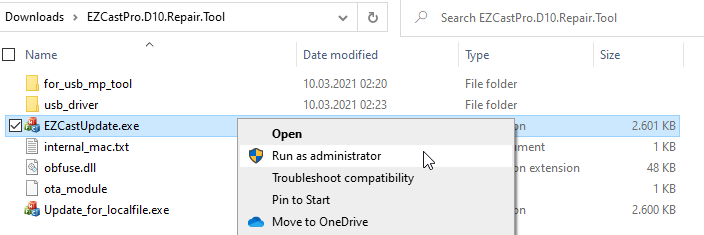
- Run EZCastUpdate.exe from the
EZCastPro.D10.Repair.Toolfolder.
This window appears. When the dongle is in update mode, the tool shows "EZCast device connected".
- Click
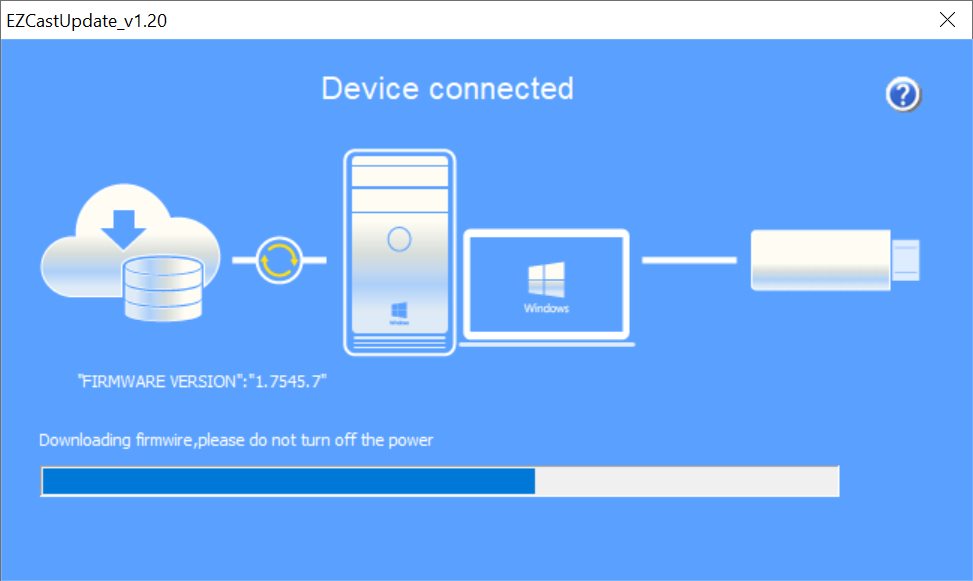
Downloadto get the latest firmware.
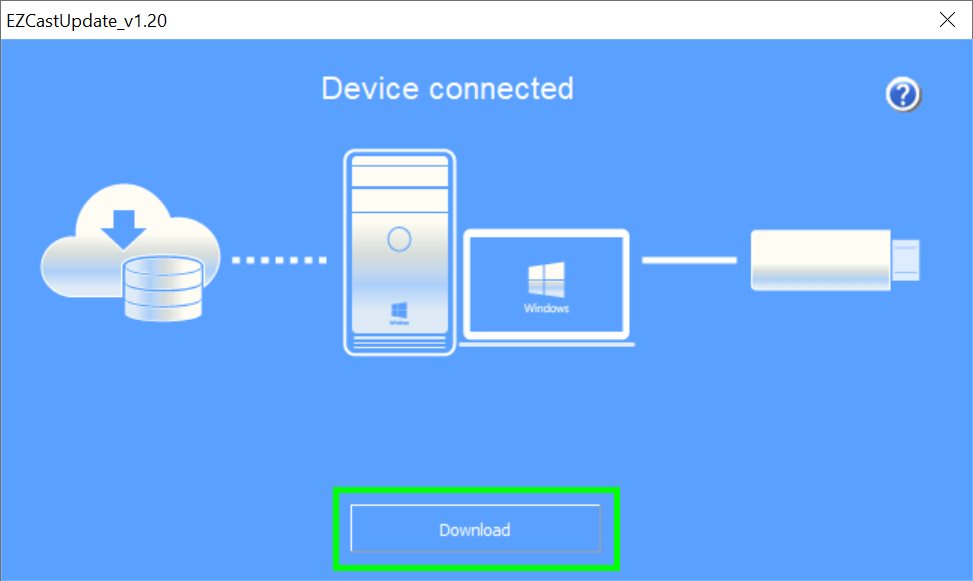
Firmware download begins.
Warning
Do not interrupt power during update.
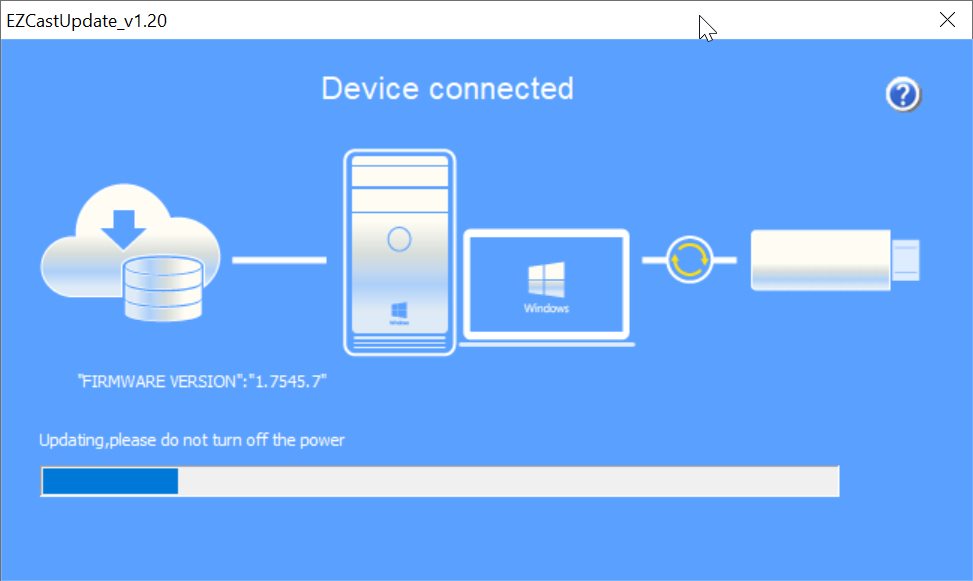
- Click
Upgradeto begin firmware installation.

Firmware installs.
Successful installation shows this message:
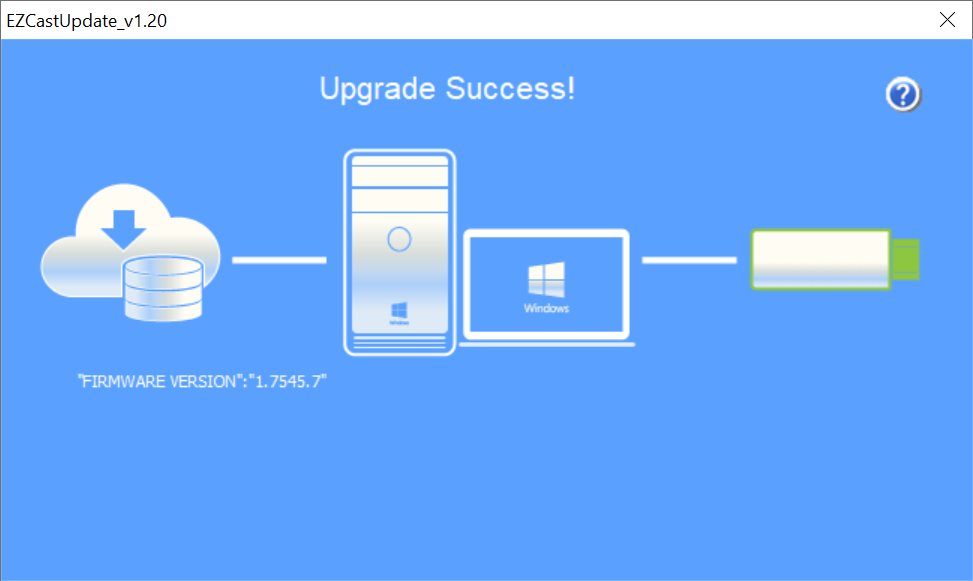
The EZCast Pro Dongle II is ready for use.
Install Alternative Firmware
To install previous or beta firmware, download one of these files:
| Firmware | Download | Notes |
|---|---|---|
| 1.17478.177 | Download | |
| 1.17478.146 | Download | |
| 1.17478.143 | Download | |
| 1.17478.141 | Download | |
| 1.17478.124 | Download | |
| 1.17478.24 | Download | |
| 1.17478.21 | Download | |
| 1.17478.20 | Download | |
| 1.13781.66 | Download | |
| 1.13781.21 | Download | |
| 1.13781.18 | Download | |
| 1.12170.19 | Download | |
| 1.9871.34 | Download |
- Run Update_for_localfile.exe from the
EZCastPro.D10.Repair.Toolfolder.
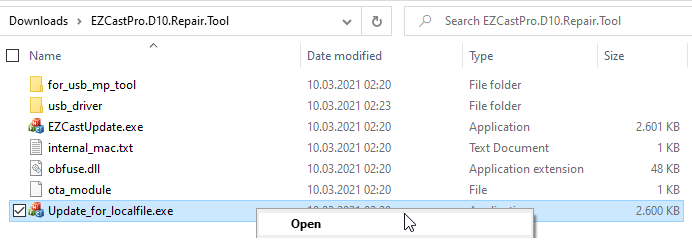
When the dongle is in update mode, the tool shows "EZCast device connected".
- Click
Firmwareto select your downloaded firmware file.
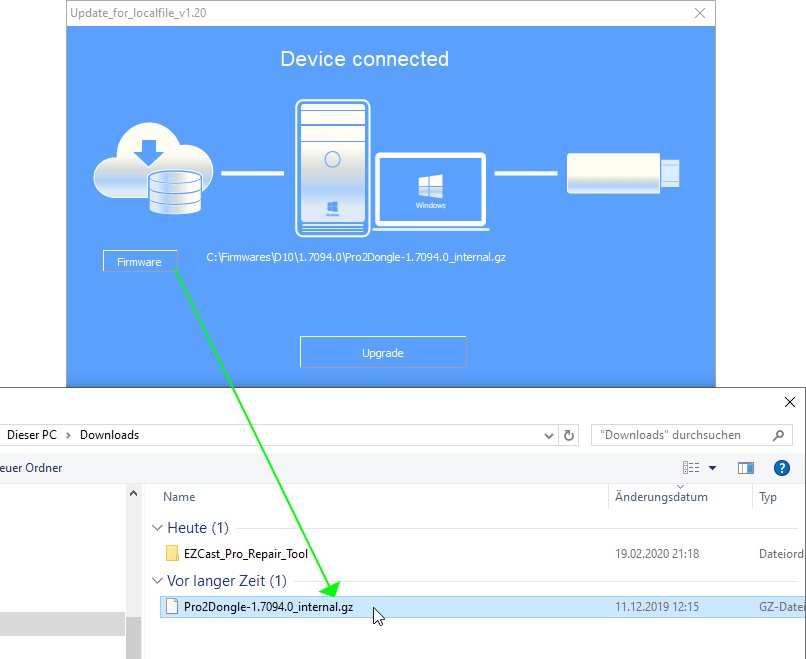
- Click
Upgradeto begin installation.
Firmware installs.

Successful installation shows this message:
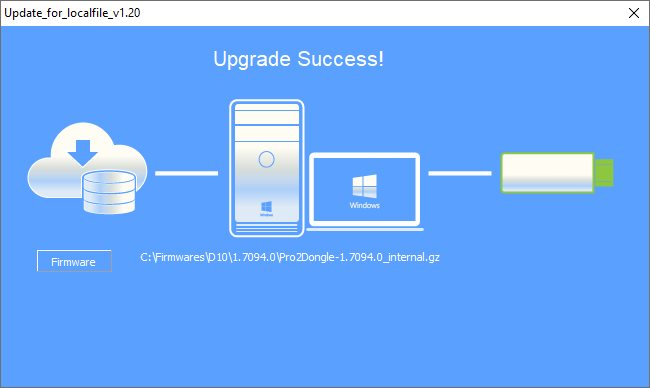
The EZCast Pro Dongle II is ready for use.
Warning
Firmware reinstallation restores factory settings. After reinstalling, check our recommended settings.
Install D15 Repair Tool
Install EZCast Pro Repair Tool
-
Download the EZCast Pro Dongle II (D15) Repair Tool.
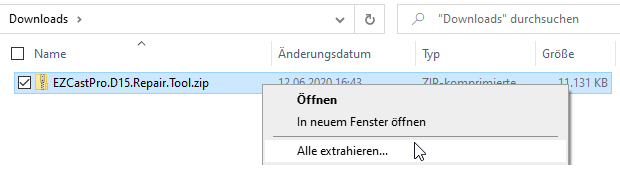
-
Extract the EZCastPro.D15.Repair.Tool.zip file.
- Install drivers by running the batch file
EZCastPro.D15.Repair.Tool\usb_driver\install.batas Administrator.
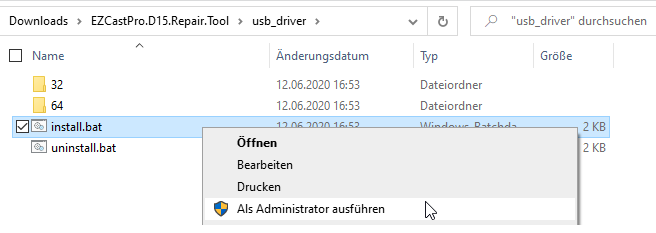
- If this security prompt appears, select "Install":
Connect USB Type C Cable
Note
Initially connect the USB Type C cable only to the stick's USB port (device powered off). Connect the other end to your PC afterward.
-
Connect the included USB Type C cable to the stick's USB port (device remains off).
-
To enter update mode: Press and hold the reset button, then connect the USB cable to your Windows PC. Release the reset button after 5 seconds.
If drivers are correctly installed and the stick is connected, you should see "Realtek generic USB Device" in Device Manager. Otherwise, recheck driver installation, cable connection, and update mode as described above.
Install Alternative Firmware
To install previous or beta firmware, download one of these files:
| Firmware | Download | Notes |
|---|---|---|
| 1.17478.177 | Download | |
| 1.17478.146 | Download | |
| 1.17478.143 | Download | |
| 1.17478.141 | Download |
- Run Update_for_localfile.exe from the
EZCastPro.D15.Repair.Toolfolder.
When the stick is in update mode, the tool shows "EZCast device connected".
- Click
Firmwareto select your downloaded firmware file.
- Click
Upgradeto begin installation.
Firmware installs.
Successful installation shows this message:
The EZCast Pro Dongle II is ready for use.
Warning
Firmware reinstallation restores factory settings. After reinstalling, check our recommended settings.
Install Firmware via CMS
The CMS (Central Management System) can install firmware on multiple EZCast Pro II devices or QuattroPods - either the latest version from the internet or previous/beta firmware.
-
Download firmware for your EZCast Pro Dongle II.
-
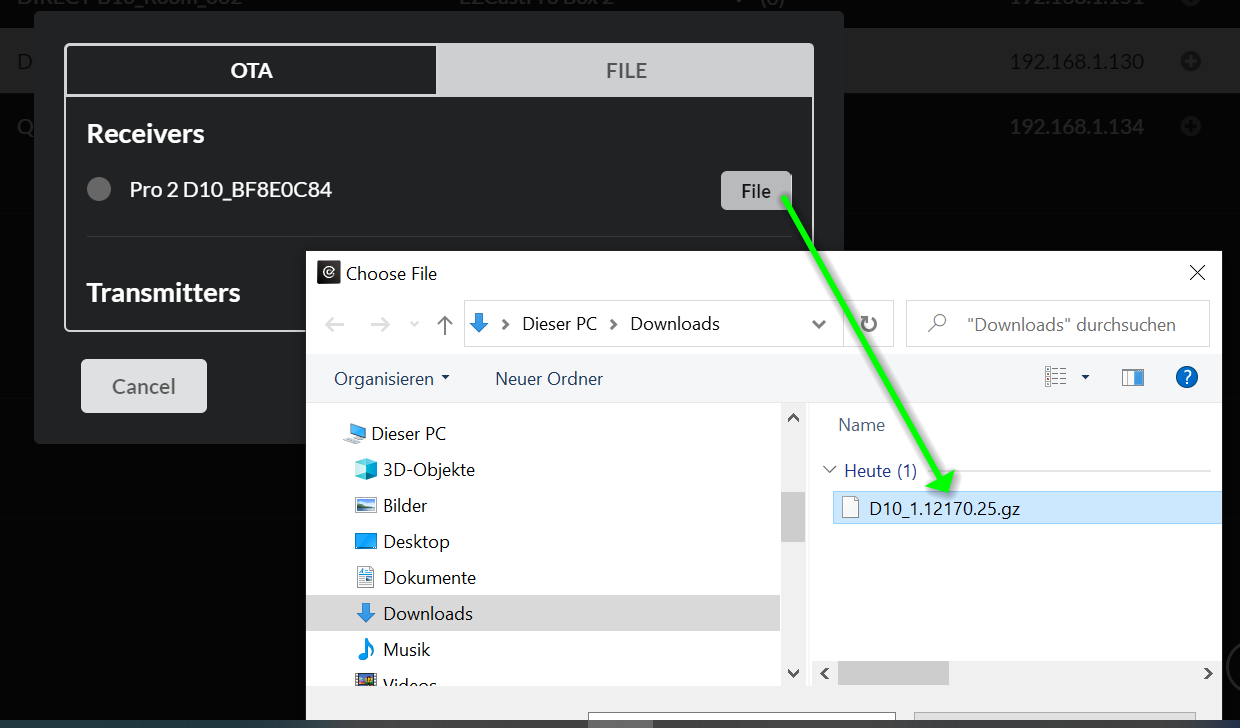
Select target devices, then click
Remote->Device Firmware upgrade.
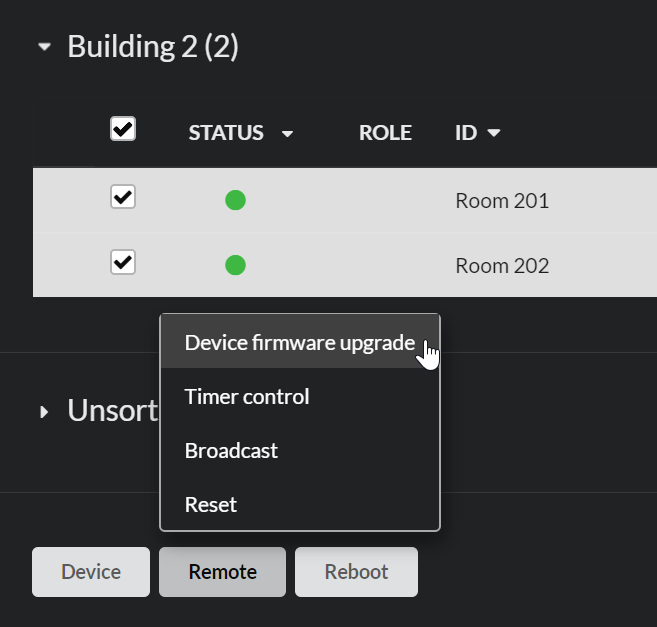
- Under the
FILEtab, clickFileto select your downloaded firmware.
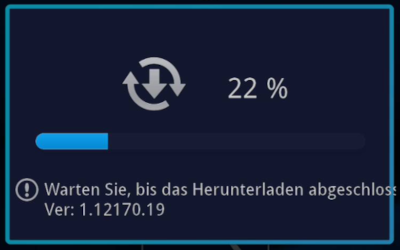
The new firmware downloads and installs automatically.
Warning
Do not interrupt power during update.
Post-Installation Settings
Firmware reinstallation resets all settings. Find our recommended configurations here.